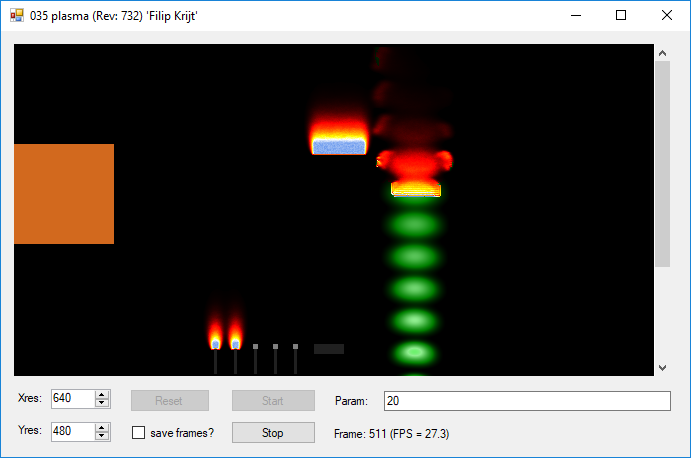
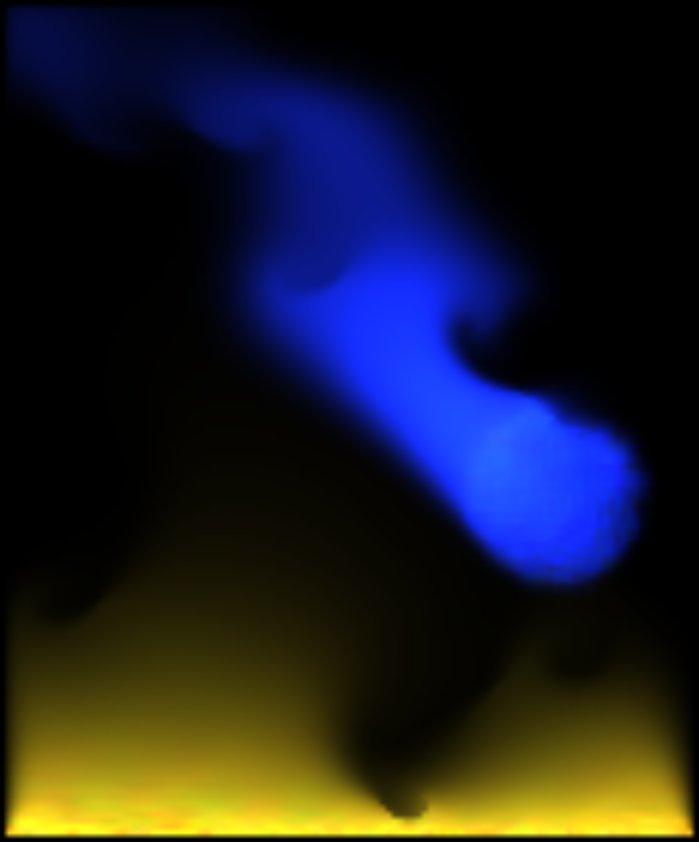
Assignment 035: Plasma simulation
The goal is to create a so-called "plasma" effect, which is intended to resemble flaming fire or diffusing smoke.
Basic information
Project 035plasma from the grcis repository is the basis of the assignment. The application features the class Simulation containing trivial implementations of all the important methods: Simulate(), Visualize(), Reset() and the response to mouse events Mouse*().
The user can change the size (in pixels) of the resulting image, start and stop the simulation, reset it and draw into the simulation field using mouse.
Simulation basics
The basic method is very simple - in each step, it will use a weighted sum of pixels around the currently calculated pixel and the result is multiplied by a constant <1, so that the fire/smoke gradually disappears. Beware of calculations in the grid from which the source values are taken. The correct way is to use the "old" (that is, currently displayed) array as a source, and to write the results into a new array. The role of the two arrays can then be swapped for the next simulation step.
At the locations of flame "source", new values are calculated (in some ad hoc way) and added to the existing values in the simulation grid.
Improved calculation
It is possible to use a nontrivial grid (2D array) of normalized vectors of the same size as the simulation grid. In the first step of the calculation (i.e. averaging of neighbors), instead of taking constant weights, we use the scalar product of the vector from the vector grid and the vector pointing from the current destionation pixel to the respective neighboring pixel. Bear in mind, though, that the weights need to be normalized so that they sum up to 1.
Inspiration
You may use the following source for your further inspiration:
Simple Fire Effect by Adam Parusel,
Lode's Fire Effect Tutorial,
Fire by Hugo Elias,
Fire/flame effect
(video),
Real-Time Fluid Dynamics for Games by Jos Stam
Technical details
At the moment, the Visualize() method converts the 2D simulation grid to a grayscale image.
Even your basic implementation must create the result colored in an interesting way.
There are multiple options to achieve this and it is up to you which one you choose.
Either you may run the entire calculation on RGB values and generate the flame directly in color -
this way, colored flames will blend together.
Another option is to leave the simulation grid scalar and use a look-up table to transform the
intensity from the grid to a color. Using this approach, one can achieve a wider range of
effects, for example a sharply defined flame or a flame changing its color as it's getting colder, etc.
The different approaches could be combined together (multi-channel simulation + LUT for each channel +
combination of the results, etc.), sky is the limit to your fantasy. No need to limit yourself to RGB, you may also use a
different color space, for example HSV.
Interaction
The application contains some fundamentals for interactive user interventions with the simulation grid. You may for example use mouse input to change values in the simulation grid, define sources, or edit the field of direction vectors. This is completely up to you - at your disposal is the handling of the following events: left mouse button pressed / released, mouse dragged.
What to change
Typically, you will work on the following methods:
- Simulation.InitParams() - initialization of the parameters (called once at the application start).
- Simulation.Simulate() - carries out one simulation step, only in the memory - nothing is drawn, yet. It is up to you if you really do only one simulation step or multiple ones (e.g. K simulation steps per one frame refresh).
- Simulation.Visualize() - simulation results visualization. Transformation into a raster image Bitmap. In the interest of performance, we recommend using the "unsafe" mode and fill the image using pointers (cf. the template implementation). Note: Visualization must not change the state of the simulation grids - the application can call it asynchronously and repeatedly (and, in the case of interaction, even from a different thread).
- Simulation.Reset() - optional (but recommended) method, reinitializes the simulation system.
- Simulation.Change() - optional (but recommended) method, called by the application upon the change of the text field Params:.
- Simulation.MouseDown() - response to left mouse push. Returns true if the image needs to be redrawn (see Simulation.Visualize()).
- Simulation.MouseUp() - response to mouse release. Returns true if the image needs to be redrawn (see Simulation.Visualize()).
- Simulation.MouseMove() - response to mouse movement. Returns true if the image needs to be redrawn (see Simulation.Visualize()).
Deadline
Due date is 9. 12. 2018
Points
3pt .. basic implementation of colored plasma, constant direction of computation for the entire range (e.g. upwards),
3pt .. previous + nontrivial vector field, directiona of computation can be different for every pixel, but it stays constant throughout the computation,
3pt .. previous + dynamic vector field,
2pt .. previous + source ofthe flame are not just rectangles at the bottom of the image, but are in some way more complex, for example a burning text label etc.,
up to 3pt .. previous + user interaction using mouse,
(altogether up to 14 pts) + bonusy
Project
Visual Studio project: 035plasma
Source file
Modify and hand in only the file: Simulation.cs
Write your name into the function InitParams().
Copyright (C) 2011-2018 J.Pelikán and J.Krivánek last change: 2019-05-09 17:52:59 +0200 (Thu, 09 May 2019)